Onward, forward! We’ve arrived at part 12 of my “Making Apple TV Apps” series. I hope you’ve enjoyed the series so far and learned something along the way. Today, I will be showing you how to add your own custom UI view components to TVML as new XML tags.
But First…
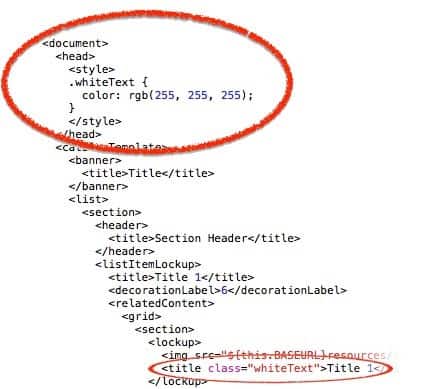
 Before we roll into extending TVML, I want to point out that you can do more with it than what I’ve covered so far in this series. For example, you can style UI elements in your TVML template using syntax that is similar to CSS declarations for HTML content, as seen in the highlighted portions of the accompanying TVML template excerpt.
You can also update your UI without rebuilding the entire screen with a new TVML template by modifying elements in the DOM, much like you would do with an AJAX web app. I won’t be covering these tasks in this series, but I will point you toward some great reference material that covers these and more at the end of this series.
When TVML Isn’t Enough
You can easily add new element types to TVML. You make the TVML engine aware of your new element by calling TVElementFactory’s registerViewElementClass method. This lets the engine know it needs to depend on your native code to provide instances of the element whenever it encounters it in your TVML templates.
When your new element is found in a template, the TVML engine will call the viewForElement method to get an instance of the associated view to be displayed. Lets take a look at the TVInterfaceCreating protocol for the details on how this works.
public protocol TVInterfaceCreating: NSObjectProtocol {
	optional public func viewForElement(element: TVViewElement, existingView: UIView?) -> UIView?
	optional public func viewControllerForElement(element: TVViewElement, existingViewController: UIViewController?) -> UIViewController?
	optional func URLForResource(_ resourceName: String) -> NSURL?
	optional func imageForResource(_ resourceName: String) -> UIImage?
}
The TVInterfaceCreating protocol has to be implemented to add new UI elements to TVML. It has up to four optional methods that you will need to implement, depending on how you’re wanting to extend TVML.
First up is the viewForElement method. You receive the TVViewElement, which is the TVML DOM object that represents your custom view. This can be an instance of the Apple-provided TVViewElement class or a custom class you’ve added that inherits from TVViewElement.
We also receive an optional existing view. This parameter will be nil if this is the first time a view for this specific TVViewElement instance is being requested, or a view instance that we previously returned if it is a subsequent request. We should always update and return the existing view instead of creating a new instance if possible.
The viewForElement method is expected to return an optional UIView instance. We should return nil unless the TVViewElement we received indicates our custom view as its desired type. If we return nil, the TVML engine will be responsible for creating the needed view instance based on information contained in the TVViewElement.
The TVInterfaceCreating protocol also defines an optional viewControllerForElement method. We can provide custom view controllers as well as individual views for use by the TVML engine. Again, as with the viewForElement method, we should return nil if the received TVViewElement doesn’t indicate our custom view controller as the desired view type.

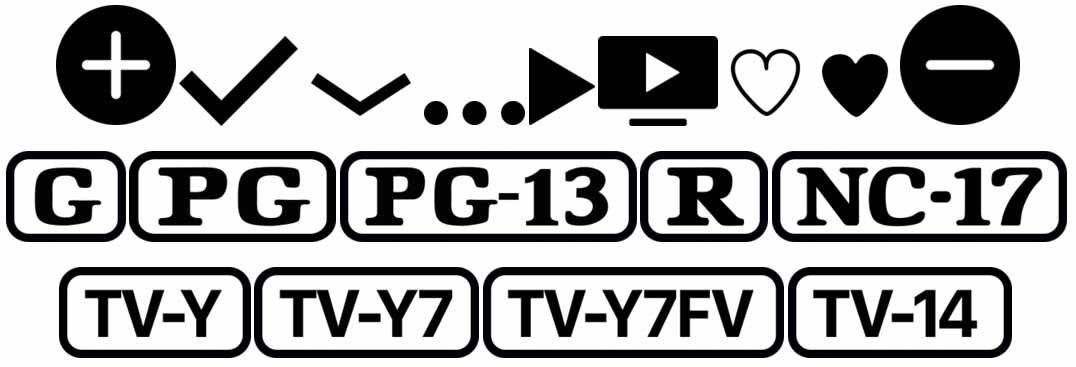
In addition to providing custom views, we can also define custom resources and use them in the same way as the system-provided ones. Examples of the system-provided resources are the various TV and movie rating symbols displayed as part of those content types’ descriptions. We can implement either URLForResource, imageForResource, or both methods, depending on the resource types we’re working with.
Time to Get Real
That’s enough theory for now. Lets look at an implementation of some of these methods. In this example, we’re going to add a custom TVML tag and associated view.
let calendarElementName = "myCustomCalendar"

func application(application: UIApplication, didFinishLaunchingWithOptions launchOptions: [NSObject: AnyObject]?) -> Bool {
    // Set ourselves up to handle the creation of our custom view when specified in the TVML
    TVInterfaceFactory.sharedInterfaceFactory().extendedInterfaceCreator = self
    TVElementFactory.registerViewElementClass(TVViewElement.self, forElementName: calendarElementName)
    return true
}
First up is the code needed to make the TVML engine aware of our new TVML tag. We indicate we’re going to create views for custom TVML tags by assigning our AppDelegate as an extended interface creator for the TVInterfaceFactory (line 5). The TVInterfaceFactory houses the logic that instantiates views for the standard TVML tags. Our AppDelegate must implement the TVInterfaceCreating protocol in order for it to be assigned to this property.
We then register the type of view element instance that is expected for our custom element name (line 6). We’re using the standard TVViewElement class type in this example, but you can create a custom TVViewElement-derived class if you want to add additional properties to be assigned from the XML data or your own code.
let calendarAttributeDateFormat = "dataFormat"
let calendarAttributeShowHolidays = "showHolidays"

func viewControllerForElement(element: TVViewElement, existingViewController: UIViewController?) -> UIViewController? {
    // Implement this optional TVInterfaceCreating method if you're creating custom view controllers
    return nil
}

func viewForElement(element: TVViewElement, existingView: UIView?) -> UIView? {
    // Implement this optional TVInterfaceCreating method if you're creating custom views

    if let existingView = existingView {
        // Perform any state/property updating based on info in the provided TVViewElement instance before returning if needed
        return existingView
    }

    // Verify our custom calendar component is being requested, otherwise return nil
    guard element.elementName == calendarElementName else { return nil }

    // Gather any specified parameters to pass to our calendar class initializer
    let dateFormat = element.attributes?[calendarAttributeDateFormat]
    let showHolidays = element.attributes?[calendarAttributeShowHolidays]

    return MyCustomCalendar(dateFormat, showHolidays: showHolidays)
}
The other piece of the equation is to implement either viewControllerForElement or viewForElement to return an instance of our custom view when our tag is encountered by the TVML engine. I’ve defined both methods in the above example (beginning at lines 4 and 9) so you can see how they appear in code, but the viewForElement implementation is the only one that is really doing anything. Lets take a closer look at it.
The first thing we want to do is check for a previously-created view being passed to us (line 12). Our sample implementation immediately returns the previously created view if one was received.
Our next step is to verify our custom view is being requested (line 18). We immediately return nil if the element’s name doesn’t match our custom view name.
Finally, if we are being asked for a new instance of our custom view, we attempt to extract a couple of attributes that may have been defined in the XML data (lines 21 and 22) and pass them on to our custom view’s initializer, which is then immediately returned to the calling code (line 24).
Finished Already?
Yes, believe it or not, that is all it takes to plug your own custom UI component into the TVML system. Once you’ve taken care of this small amount of code, your custom component can be declared in your TVML templates just like the framework-defined ones.

In the next part of this series (lucky number 13!), we see how to communicate and even execute code and return results between our app’s JavaScript code and its native Objective-C and/or Swift code. We’re getting close to covering the full gambit of new things Apple has provided with tvOS. I hope you’ll join me for the rest of this series, or even sign up for delivery of this and future series in your inbox.
Leave a Reply