We’ve entered the realm of double digits, so things must be getting serious! Welcome to part 10 of my “Making Apple TV Apps” series. Its time to create and run our first TVJS/TVML based app.
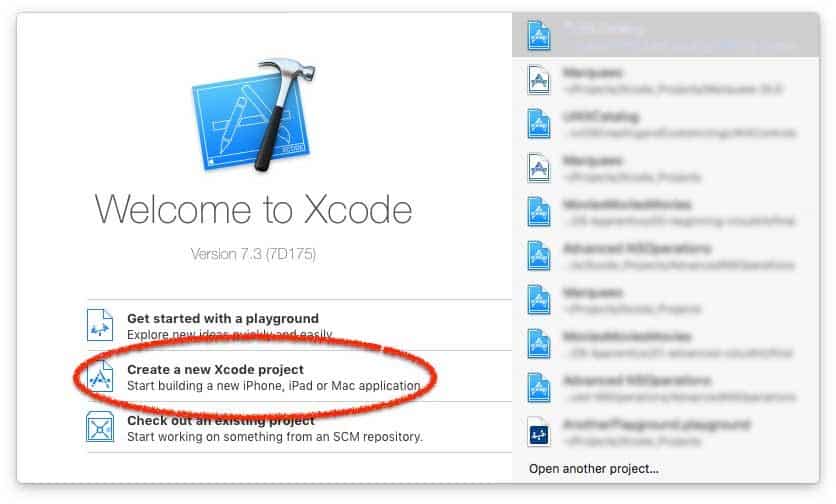
We start off just like any other new project in Xcode, by selecting “Create a new Xcode project” from the Xcode welcome screen, or by selecting File – New – Project from the Xcode application menu.
Select “tvOS – Application – TVML Application” from the template chooser.
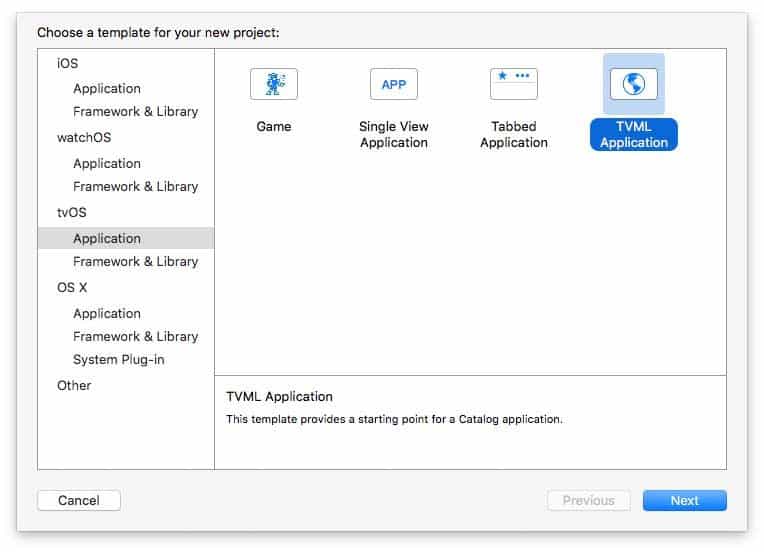
Specify a name for your new app and BAM! You’ve just created your first TVML-based app! Granted, it probably won’t do much yet, but that’s how easy it is to get started.
Before we launch it to see what it does, I want you to look closely at the files Xcode created for us. Notice anything in particular? Allow me to point out a few things.
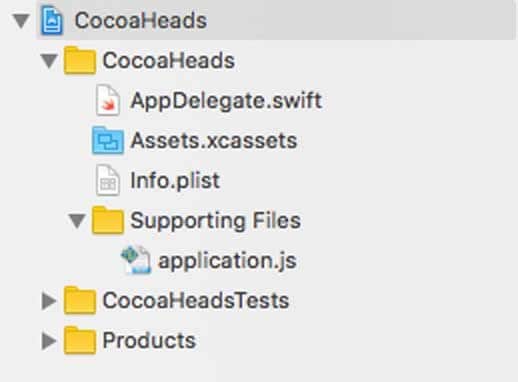
First, even though we’re expecting to create our app in JavaScript, an AppDelegate class has been created in the project. I also see an application.js file, which is probably more along the lines of what you were expecting.
We should also take note of what isn’t there, such as a ViewController class and a storyboard file. Those files weren’t created by Xcode because we’re expected to be defining all our user interface using TVML templates.
Let’s launch our new app and see what happens.
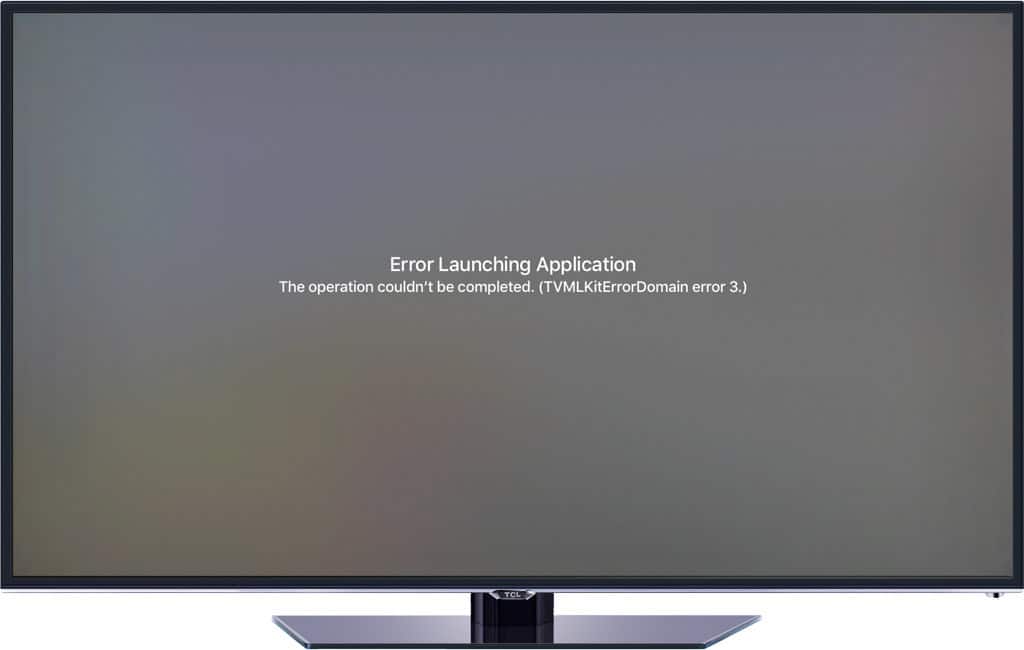
Okay…there definitely isn’t much happening in our app. I’m not sure what we’re seeing is the intended result, either. I looked for a “read me” file in the project in case there is some additional setup that we need to take care of. There wasn’t one created, not at the time I wrote this article at least, but Apple could add one in the future. So lets review the source to see what’s going on.
We’ll review the AppDelegate class first. I see a couple of things that I want to draw your attention to.
@UIApplicationMain
class AppDelegate: UIResponder, UIApplicationDelegate, TVApplicationControllerDelegate {

    var window: UIWindow?
    var appController: TVApplicationController?

    static let tvBaseURL = "http://localhost:9001/"
    static let tvBootURL = "\(AppDelegate.tvBaseURL)/application.js"
The first item is a new protocol being implemented by our AppDelegate class (line 2) called TVApplicationControllerDelegate. This protocol was introduced by tvOS. It must be implemented by any app that is using the TVJS and TVML frameworks. It doesn’t have anything to do with the problem we encountered, but is something new to tvOS. We’ll take a closer look at it later in this article.
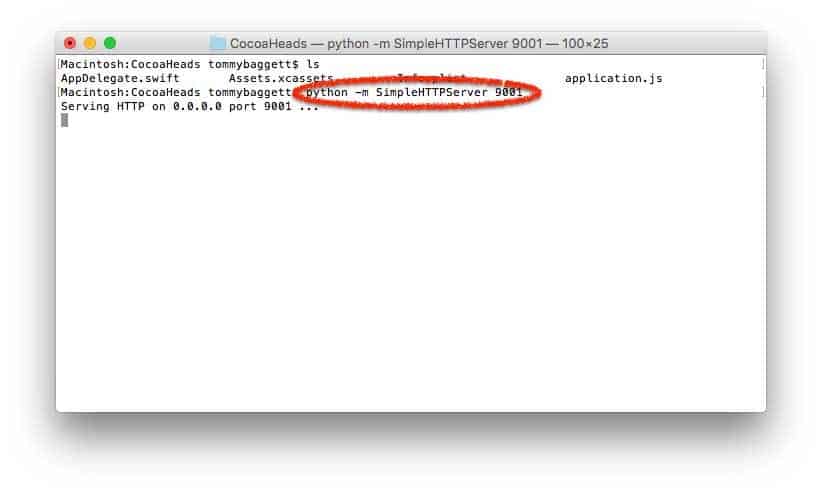
The next thing to note is the two static string definitions (lines 7 and 8). Remember, we’re supposed to be creating a client/server app here, right? It looks like our starter app expects a local development web server to be running on port 9001. We can take care of that by using the Python SimpleHTTPServer script, which we’ll launch from the terminal.
Lets try running the app again, now that it should be able to fetch its needed content.
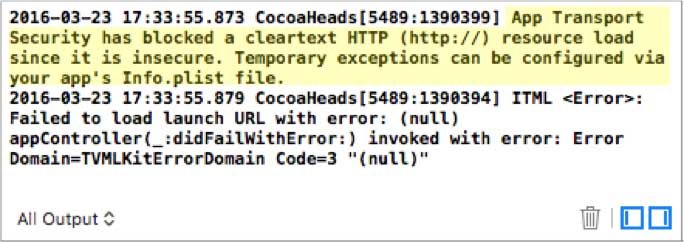
We still get the same result! But this time, there is a clue in our Xcode debug window:
You might’ve run into this before. Apple began enforcing security best practices by disabling all non-secure connections with the release of iOS 9, and carried it on to tvOS.
This one is easy enough to fix with an addition to our application’s Info plist file:
We add a new NSAppTransportSecurity dictionary that contains an NSAllowsArbitraryLoads boolean value. While you shouldn’t do this in your production apps, it will be fine to get our test app up and running with our localhost-based test server.
With that taken care of, we try to run our app again.
Awesome! Hello World! I’m pretty sure that is what we should be seeing from our new TVML-based app.
A Closer Look at TVApplicationControllerDelegate
Now that we have our test app running as expected, lets look at the new TVApplicationControllerDelegate protocol.
public protocol TVApplicationControllerDelegate : NSObjectProtocol {
    optional public func appController(appController: TVApplicationController, evaluateAppJavaScriptInContext jsContext: JSContext)
    optional public func appController(appController: TVApplicationController, didFinishLaunchingWithOptions options: [String : AnyObject]?)
    optional public func appController(appController: TVApplicationController, didFailWithError error: NSError)
    optional public func appController(appController: TVApplicationController, didStopWithOptions options: [String : AnyObject]?)
}
This protocol defines four optional methods that let us observe and manage different states of a TVApplicationController object. The TVApplicationController is responsible for executing our JavaScript code and converting our TVML templates into actual user interface view components.
The four TVApplicationControllerDelegate protocol methods are:
| appController: didFailWithError | Tells the delegate the app controller failed due to an error |
| appController: didFinishLaunchingWithOptions | Tells the delegate the app controller has finished launching |
| appController: didStopWithOptions | Tells the delegate the app has stopped for any reason |
| appController: evaluateAppJavaScriptInContext | Allows the delegate to add JavaScript classes and objects |
You may be thinking that this protocol is similar to the existing UIApplicationDelegate protocol. The difference here is that these methods aren’t called until our application’s TVApplicationController has been fully initialized, which includes loading its initial JavaScript application file, or encounters an error during that initialization process.
Before we review our test app’s implementation of the TVApplicationControllerDelegate protocol methods, we’ll look at how our app’s TVApplicationController gets initialized in our AppDelegate’s application:didFinishLaunchingWithOptions method.
    func application(application: UIApplication, didFinishLaunchingWithOptions launchOptions: [NSObject: AnyObject]?) -> Bool {
        // Override point for customization after application launch.
        window = UIWindow(frame: UIScreen.mainScreen().bounds)

        // Create the TVApplicationControllerContext for this application and set the properties that will be passed to the `App.onLaunch` function in JavaScript.
        let appControllerContext = TVApplicationControllerContext()

        // The JavaScript URL is used to create the JavaScript context for your TVMLKit application. Although it is possible to separate your JavaScript into separate files, to help reduce the launch time of your application we recommend creating minified and compressed version of this resource. This will allow for the resource to be retrieved and UI presented to the user quickly.
        if let javaScriptURL = NSURL(string: AppDelegate.tvBootURL) {
            appControllerContext.javaScriptApplicationURL = javaScriptURL
        }

        appControllerContext.launchOptions["BASEURL"] = AppDelegate.tvBaseURL

        if let launchOptions = launchOptions as? [String: AnyObject] {
            for (kind, value) in launchOptions {
                appControllerContext.launchOptions[kind] = value
            }
        }

        appController = TVApplicationController(context: appControllerContext, window: window, delegate: self)

        return true
    }
It starts with a new TVApplicationControllerContext being created (line 6). This context stores information needed to initialize our TVApplicationController, including the first JavaScript file that should be loaded and executed (line 10), as well as any launch options that were passed to us when our app was launched (line 17).
Once our context is prepared, we can initialize our app’s TVApplicationController (line 21). Calling its initializer and providing the needed context, window and TVApplicationControllerDelegate is all that is needed to get the JavaScript code and XML data displaying our app.
Going back to the protocol implementation, we see that 3 of the 4 optional methods specified in the protocol have been implemented in our test app in the following AppDelegate code excerpt.
    func appController(appController: TVApplicationController, didFinishLaunchingWithOptions options: [String: AnyObject]?) {
        print("\(#function) invoked with options: \(options)")
    }

    func appController(appController: TVApplicationController, didFailWithError error: NSError) {
        print("\(#function) invoked with error: \(error)")

        let title = "Error Launching Application"
        let message = error.localizedDescription
        let alertController = UIAlertController(title: title, message: message, preferredStyle:.Alert )

        self.appController?.navigationController.presentViewController(alertController, animated: true, completion: {
            // ...
        })
    }

    func appController(appController: TVApplicationController, didStopWithOptions options: [String: AnyObject]?) {
        print("\(#function) invoked with options: \(options)")
    }
There isn’t much happening here beyond console output when things work as expected, or a UIAlertController being displayed when they don’t. Note also that the code in didFailWithError is creating and presenting the alert controller the same way we’re used to with iOS apps, by calling the presentViewController method. In fact, this is the code that was displaying the error information when our test app wasn’t launching successfully earlier. This is one example of how we can inject our own views into the user interface being created from our TVML-based templates.
Our test app also has other common state-related methods implemented, including applicationWillResignActive, applicationDidEnterBackground, and others. Looking at these methods’ implementations, we see they’re all calling a method called executeRemoteMethod.
    func applicationWillResignActive(application: UIApplication) {
        // Sent when the application is about to move from active to inactive state. This can occur for certain types of temporary interruptions (such as an incoming phone call or SMS message) or when the user quits the application and it begins the transition to the background state.
        // Use this method to pause ongoing tasks, disable timers, and stop playback
        executeRemoteMethod("onWillResignActive", completion: { (success: Bool) in
            // ...
        })
    }

    func applicationDidEnterBackground(application: UIApplication) {
        // Use this method to release shared resources, save user data, invalidate timers, and store enough application state information to restore your application to its current state in case it is terminated later.
        // If your application supports background execution, this method is called instead of applicationWillTerminate: when the user quits.
        executeRemoteMethod("onDidEnterBackground", completion: { (success: Bool) in
            // ...
        })
    }

    func applicationWillEnterForeground(application: UIApplication) {
        // Called as part of the transition from the background to the inactive state; here you can undo many of the changes made on entering the background.
        executeRemoteMethod("onWillEnterForeground", completion: { (success: Bool) in
            // ...
        })
    }

    func applicationDidBecomeActive(application: UIApplication) {
        // Restart any tasks that were paused (or not yet started) while the application was inactive. If the application was previously in the background, optionally refresh the user interface.
        executeRemoteMethod("onDidBecomeActive", completion: { (success: Bool) in
            // ...
        })
    }

    func applicationWillTerminate(application: UIApplication) {
        // Called when the application is about to terminate. Save data if appropriate. See also applicationDidEnterBackground:.
        executeRemoteMethod("onWillTerminate", completion: { (success: Bool) in
            // ...
        })
    }
executeRemoteMethod is a custom method that is also implemented in our test app. It demonstrates how we can call a method defined in our JavaScript code from the native app side.
    func executeRemoteMethod(methodName: String, completion: (Bool) -> Void) {
        appController?.evaluateInJavaScriptContext({ (context: JSContext) in
            let appObject : JSValue = context.objectForKeyedSubscript("App")

            if appObject.hasProperty(methodName) {
                appObject.invokeMethod(methodName, withArguments: [])
            }
        }, completion: completion)
    }
executeRemoteMethod starts off with a call to the evaluateInJavaScriptContext method that is defined in the TVApplicationControllerDelegate protocol. When its completion block is executed, it receives a JSContext object, which gives us access to the state of the JavaScript Core environment being used to run our JavaScript code. From this context, we can access both functions and data on the JavaScript side of our app.
In the block beginning on line 3, we first get a reference to our JavaScript “App” object. Then, we test the existence of a property with the method name that was passed to us (line 5). If it exists, we invoke the method (line 6). Although the current implementation doesn’t pass arguments to the method, we could modify it to do that as well if needed. Finally, the completion block that was passed to us is executed when the execution of the JavaScript method has been completed (line 8).
Next, we take a look at the application.js file that was created as part of our app.
App.onLaunch = function(options) {
    var alert = createAlert("Hello World!", "Welcome to tvOS");
    navigationDocument.pushDocument(alert);
}

App.onWillResignActive = function() {
}

App.onDidEnterBackground = function() {
}

App.onWillEnterForeground = function() {
}

App.onDidBecomeActive = function() {
}

App.onWillTerminate = function() {
}

var createAlert = function(title, description) {
    var alertString = `<?xml version="1.0" encoding="UTF-8" ?>
        <document>
          <alertTemplate>
            <title>${title}</title>
            <description>${description}</description>
          </alertTemplate>
        </document>`

    var parser = new DOMParser();

    var alertDoc = parser.parseFromString(alertString, "application/xml");

    return alertDoc
}
Empty placeholder functions have been created (lines 6 through 19) to be called by the different state change methods on the native side of our app. We also see a closure being assigned to the JavaScript onLaunch event at the top of the file. It displays our “Hello World” message. It relies on the createAlert helper function (lines 21 through 35) to create a simple TVML-based template and convert it to a DOM element. That’s right, TVML-based apps use a document object model that is similar to the DOM seen in a web browser! We’ll see more examples of this in our next article.
Up Next…
This part of our series has really gotten our feet wet with tvOS, including a fair bit of code. Even if you didn’t create your own project in Xcode while reading along, hopefully you now have a good idea of what to expect.
The next logical step is looking at how we debug TVML-based apps. That will be the subject of the next article in the series. Drop by again soon to check it out, or sign up for it to be delivered to you as soon as its available. Until then, keep it between the margins!


Leave a Reply